Getting started
A quick overview of how to get started with Phenix.
1. Download Phenix and install
Information how to download Phenix and installation instructions for each platform can be found here.
2. The Phenix GUI
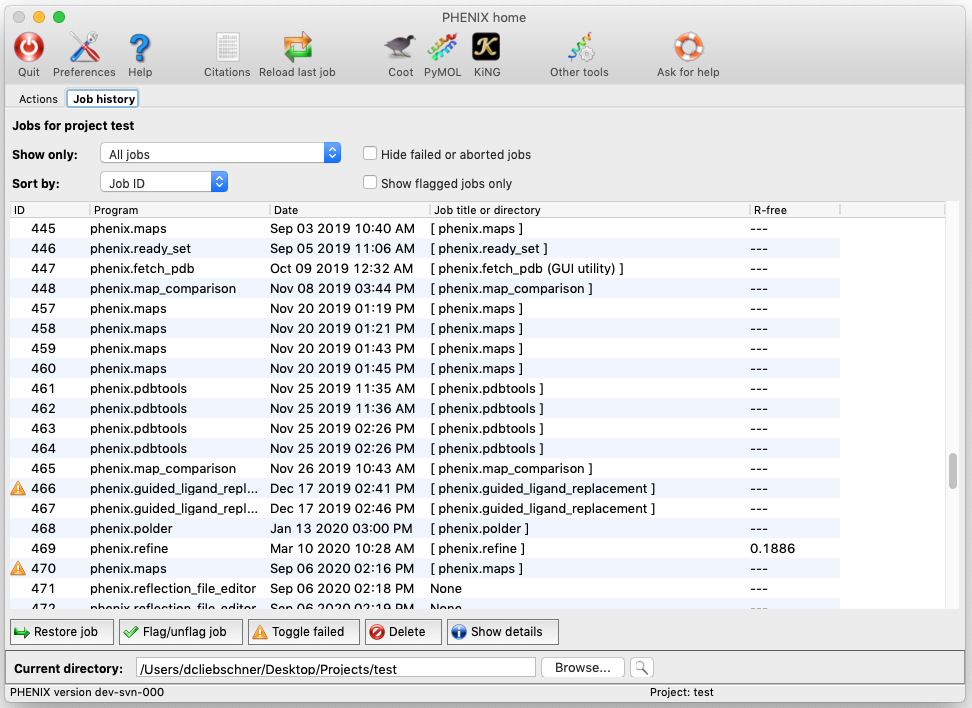
The Phenix GUI (Fig. 1) serves as a frontend to the command-line programs with the addition of several graphical utilities. The GUI runs on Linux, MacOS and Windows but Windows has some limitations.
The main GUI is started by typing the command phenix; the GUI will also open automatically when you launch any of the individual program GUIs. However, you should not run more than one instance of the GUI at a time, to avoid conflicts with internal database files.
Modules
Individual programs are grouped by category (Fig. 1). Most of the GUI tools correspond to command-line programs, and the documentation for the command-line version should be the primary reference for understanding program behavior and inputs. However, additional GUI documentation is available for some programs.
Other tools
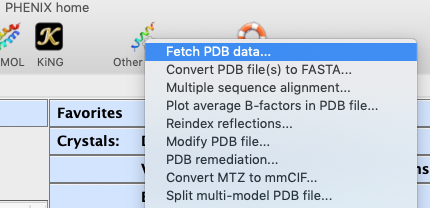
A number of simpler tasks involving file modification and visualization can be accessed by clicking the button labeled "Other tools" on the toolbar (Fig. 2).

3. Projects
Phenix manages data and job history by grouping them into projects. You will be prompted to create a project the first time you start the GUI. On subsequent launches, Phenix will attempt to guess the project based on the current directory. Project management requires the following:
- Project directories may not be nested. Namely, you may not create a project for a directory that is part of an existing project, or that has a subdirectory that is owned by another project.
- When a project is created Phenix will create a ".phenix" folder in the project directory; this is used to store the job history, temporary files, and other internal data. Users should not need to modify this folder. All functions related to project management are available from the main GUI.
4. Running Phenix Tutorials
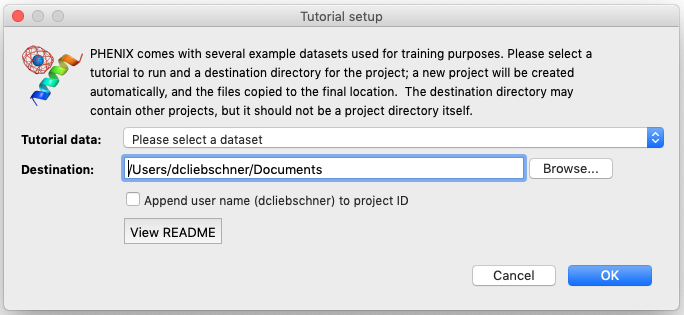
A number of examples using published models and data (tutorial data) are included in the Phenix installation. They can be automatically loaded into the GUI as new projects. To load this tutorial data, click on "New project" in the main GUI; this window also appears the first time the Phenix GUI is started (before any projects have been created). Then click the "Set up tutorial data" button to open a new dialog (see Fig. 4) with a list of examples, which are grouped by the methods they are intended to demonstrate.
These tutorial examples are often used for live demonstrations at workshops (in-person or virtual).
5. Preferences
Some of the behavior of the GUI can be customized via the "Preferences" dialog (see Fig. 5), which is available from the File menu (Linux) or Phenix menu (Mac) and on the toolbar of most programs.
"Other Preferences" settings determine what external programs are used for various file types, the interactions with molecular graphics programs (Coot, PyMOL, and the simple built-in graphics), and options for some of the specific modules in Phenix.

6. Reporting bugs

Bugs in the code may result in a pop-up window (see Fig. 6) containing a detailed error message. Clicking "OK" will send an email to the Phenix developers with this information. We strongly encourage users to submit these reports, as they are one of the primary mechanisms by which we identify coding errors. The report will include the error message, information about the host system, and the user name and email, but no other data. Including the email address is important for contacting users with advice on how to work around any issues or for requesting more information or data required to track down and fix a bug. We appreciate the help in making Phenix more robust.